Snowpack, React, Chakra UI and Typescript | Project Setup
8 min read

I took a break from the “best” thing (Cyberpunk 2077) that happened last year and I was thinking to give a try to Snowpack and to Chakra UI, and to setup a small app. Source code can be found here: react-snowpack(GitHub), or react-snowpack in VS Code(github1s)

Introduction
I will write a few words about every library that I will use for this app. The final app can be found here: react-snowpack

Snowpack is a lightning-fast frontend build tool, designed for the modern web. It is an alternative to heavier, more complex bundlers like webpack or Parcel in your development workflow. Snowpack leverages JavaScript’s native module system (known as ESM) to avoid unnecessary work and stay fast no matter how big your project grows.
Features:
- Instant startup Snowpack’s unbundled web development server starts up in 50ms or less and stays fast in large project
- Build once, cache forever: Snowpack never builds the same file twice. Powered by JavaScript’s native module system (ESM) in the browser.
- Out-of-the-box support: Enjoy Snowpack’s built-in support for JSX, TypeScript, React, Preact, CSS Modules.
- HMR feat. Fast Refresh: No refresh required. See changes reflected instantly in the browser with HMR + Fast Refresh for React, Preact & Svelte
Once you go Snowpack, it’s impossible to go back. :)

Best thing that has happened in Web Development. :)

Chakra UI is a simple, modular and accessible component library that gives you the building blocks you need to build your React applications.
Features:
- Accessible Chakra UI strictly follows WAI-ARIA standards for all components.
- Themeable: Customize any part of our components to match your design needs.
- Composable: Designed with composition in mind. Compose new components with ease.
- Light and Dark UI: Optimized for multiple color modes. Use light or dark, your choice.
- Developer Experience: Guaranteed to boost your productivity when building your app or website.

TypeScript is a programming language developed and maintained by Microsoft. It is a strict syntactical superset of JavaScript and adds optional static typing to the language. It is designed for development of large applications and transcompiles to JavaScript. As TypeScript is a superset of JavaScript, existing JavaScript programs are also valid TypeScript programs.
It may be used to develop JavaScript applications for both client-side and server-side execution (as with Node.js or Deno). There are multiple options available for transcompilation. Either the default TypeScript Checker can be used, or the Babel compiler can be invoked to convert TypeScript to JavaScript.
And is second best thing that happened in Web Development. :)
Project Setup
We will use the official starter template with React and TypeScript from the Snowpack documentation, run the following command in your terminal:
npx create-snowpack-app react-snowpack \
--template @snowpack/app-template-react-typescript \
--use-yarn
The above command will set up our development environment so that we can use the latest JavaScript features, provides a nice developer experience, and optimizes our app for production. We’ll need to have Node >= 8.10 and npm >= 5.6 on our machine.
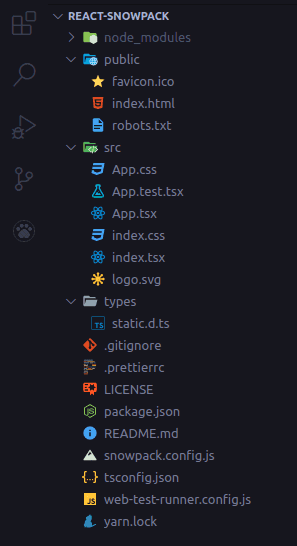
Now, if we open the react-snowpack folder we will see something like this:
(I’m using VS Code)
Clean Up
The next thing I would like to do is to remove the unnecessary .css and .tsx files from src folder that will not be needed in this app. Delete the following: App.tsx, App.css, App.test.tsx, index.css, logo.svg from src folder.
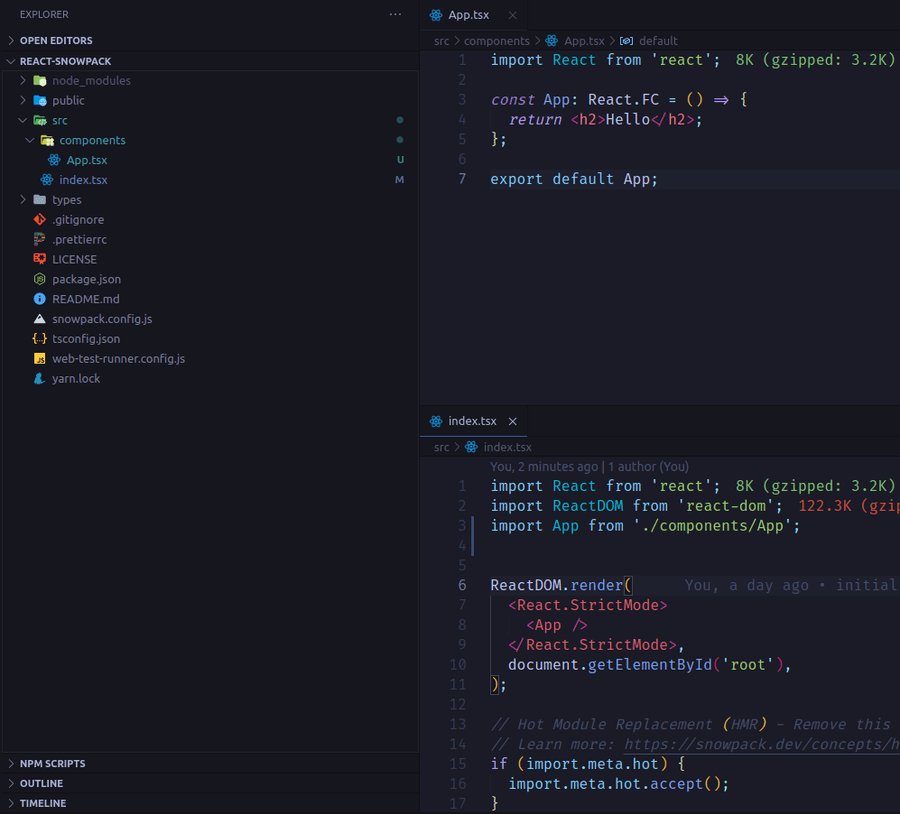
Create a folder src/components, inside the folder create a new file App.tsx, and add the following:
// src/components/App.tsx

import React from 'react';

const App: React.FC = () => {
  return <h2>Hello! You made it!</h2>;
};

export default App;
In the src/index.tsx we should remove the import './index.css'; and change import App from './App'; to import App from './components/App';.
// src/index.tsx

import React from 'react';
import ReactDOM from 'react-dom';
import App from './components/App';


ReactDOM.render(
  ...
At the end we should have something like this:
Let’s start the app with the following command:
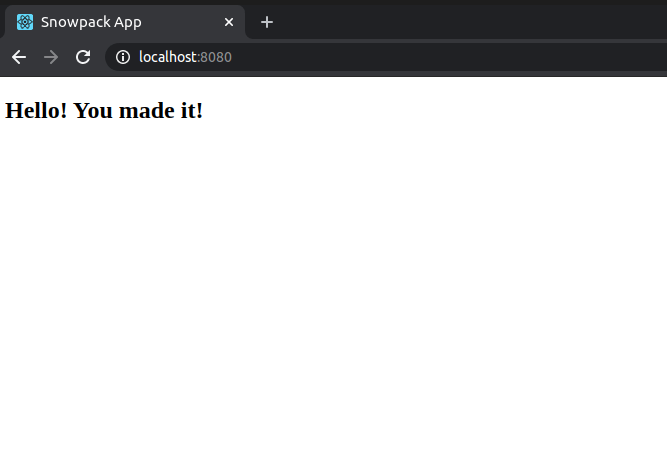
yarn startIf everything is alright and if we navigate in browser to http://localhost:8080/ (in my case) we should see something like this:
Chakra UI
Inside your React project directory, install Chakra UI by running the following:
yarn add @chakra-ui/react @emotion/react @emotion/styled framer-motionThen in our src/index.tsx, optional, we will need to add a script that will help to prevent the flash of color mode during page load.
// index.tsx

import { ColorModeScript } from '@chakra-ui/react'
...

ReactDOM.render(
 <React.StrictMode>
	 <ColorModeScript />
	 <App />
 </React.StrictMode>,
document.getElementById('root')
)

...
After this in src/components/App.tsx we will need to add the Chakra Provider, the theme, I will use the default theme, and we will reset the css with the build it function resetCSS. Also I will replace the h2 tag with Heading component.
// src/components/App.tsx

import { ChakraProvider, Heading, theme } from '@chakra-ui/react'
...

return (
 <ChakraProvider theme={theme} resetCSS>
	<Heading size="lg">Hello! You made it again!</Heading>
 </ChakraProvider>
)

...
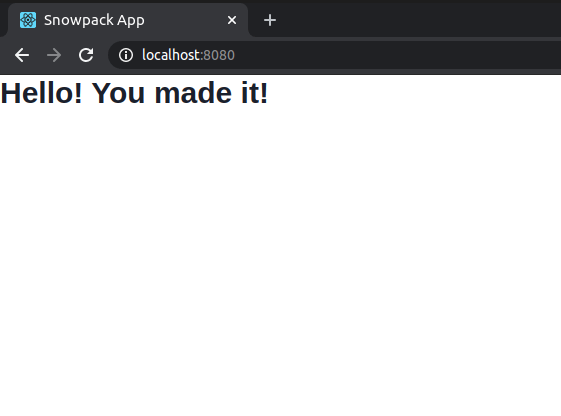
If everything went well so far and if you go to http://localhost:8080/ you should see something like this:
Optional steps
This section is optional. We will setup Prettier to make our code to look beautiful, ESLint to easily find and fix problems in our code, and we will setup a plugin for Snowpack so the production version of the app will be well optimized.
Prettier
In the project’s root, let’s rename the file .prettierrc to .prettierrc.js and replace its content with the following:
// .prettierrc.js

module.exports = {
  semi: false, // Print semicolons at the ends of statements.
  trailingComma: 'es5', // Trailing commas where valid in ES5 (objects, arrays, etc.)
  jsxBracketSameLine: false, // Put the > of a multi-line JSX element at the end of the last line
  singleQuote: true, // Use single quotes instead of double quotes.
  printWidth: 90, // Specify the line length that the printer will wrap on.
  useTabs: true, // Indent lines with tabs instead of spaces.
  tabWidth: 2, // Specify the number of spaces per indentation-level.
  jsxSingleQuote: false, // Use single quotes instead of double quotes in JSX.
  endOfLine: 'auto', // Maintain existing line endings
};
More information about the Prettier config can be found in the official docs.
ESLint
ESlint is not available in our project yet so we will need to install it first (-D only for development), together with some plugins to make it work with TypeScript adn with Prettier.
yarn add -D @typescript-eslint/parser @typescript-eslint/eslint-plugin \
eslint-config-prettier eslint-plugin-jsx-a11y \
eslint-plugin-prettier eslint-plugin-react \
eslint-plugin-react-hooks eslint \
eslint-plugin-simple-import-sort
In the project’s root we will need to create a file .eslintrc.js and add the following content.
// .eslintrc.js

module.exports = {
  root: true,
  parser: '@typescript-eslint/parser',
  parserOptions: {
    ecmaVersion: 2020,
    sourceType: 'module',
    ecmaFeatures: {
      jsx: true,
    },
  },
  settings: {
    react: {
      version: 'detect',
    },
  },
  env: {
    browser: true,
    amd: true,
    node: true,
  },
  plugins: ['simple-import-sort'],
  extends: [
    'eslint:recommended',
    'plugin:@typescript-eslint/eslint-recommended',
    'plugin:@typescript-eslint/recommended',
    'plugin:react/recommended',
    'plugin:jsx-a11y/recommended',
    'plugin:react-hooks/recommended',
    'plugin:prettier/recommended',
  ],
  rules: {
    'prettier/prettier': ['error', {}, { usePrettierrc: true }],
    '@typescript-eslint/ban-ts-comment': 'off',
    'react/prop-types': 'off',
    'simple-import-sort/imports': 'warn',
  },
};
The above configuration file for ESLint will ensure that we use the best practices when it comes to typescript, react, hooks, and A11y (accessibility guidelines).
Import aliases
We can change our imports from ../../../components/Button to @/components/Button. For that we just have to do few changes in tsconfig.json and snowpack.config.js:
// snowpack.config.js
...

alias: {
	'@': './src',
},

...
// tsconfig.json
...
"baseUrl": ".",
"paths": {
"@/*": ["src/*"]
},
...That’s all.
Optimize for production
At the moment, Snowpack’s built-in optimizing support is still experimental and is recommended to use Webpack to bundle your app for production. First, let’s install the plugin:
yarn add -D @snowpack/plugin-webpackAfter the plugin was installed add it in the project root / snowpack.config.js inside the plugins: [ ... ] like this:
// snowpack.config.js
...

plugins: [
  '@snowpack/plugin-react-refresh',
  '@snowpack/plugin-dotenv',
  '@snowpack/plugin-typescript',
  [
    '@snowpack/plugin-webpack',
    {
      /**
       * Plugin Options
       *
       * https://github.com/snowpackjs/snowpack/tree/main/plugins/plugin-webpack#readme
       *
       * */
    },
  ],
],

...
And we are done with the optional part.
“Insert name here” app
Now that we have everything we need for our project is time to finally do some codding for our awesome app.
- #react
- #snowpack
- #typescript
- #chakra
- #javaScript
- #eslint
- #prettier